“Image Tools with BMP Support” Documentation by “Jarrod Oberto” v1.2
“Image Tools with BMP Support”
Created: 17/05/2011
By: Jarrod Oberto
Email: codecanyon@oberto.co.nz
Thank you for purchasing my image library. If you have any questions that are beyond the scope of this help file, please feel free to email via my user page contact form here. Thanks so much!
Table of Contents
- How to Install
- Image Tools
- Batch Resize
- Dynamic URI's (thumbnails on the fly)
- Image Uploader
- Supported Image Types
- Using Colors
- Advanced Settings - Core Library
- Advanced Settings - Thumb Library
- Requirements
- Troubleshooting
- Sources and Credits
A) How to Install - top
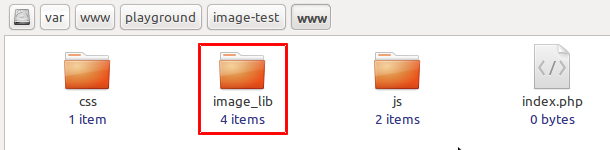
To get setup and ready to use Image Tools with BMP Support, simply copy the image_lib folder from the ZIP archive you downloaded into the root folder of your project folder.
B) Image Tools - top
Usage
Usage of Image Tools with BMP Support is simple: You open your image, perform some actions, and then save your image. Each one of these steps requires just a single line of PHP code.
Here are the detailed steps:
- The first step is to include the Image Tools with BMP Support class, enclosed within PHP tags. This is done like so.
- Next we open an image file we want to apply some actions to. In doing so we're creating an object out of our image and assigning it to a variable. In this case I've chosen $imageLibObj as the variable name.
- Here we apply our filters and transformations or, as it will be referred to from now on, actions.
- And finally we save our image.
include('image_lib/image_lib_class.php');
Note: If you put your image_lib folder in a different location than shown above, you will need to change the path accordingly.
$imageLibObj = new imageLib('path/to_image.jpg');
Be sure to change "path/to_image.jpg" to the path and name of your image.
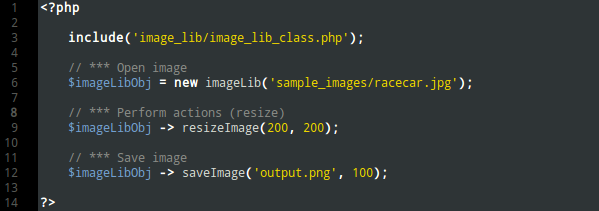
Below is a very basic example of an action used for demonstration. It resizes you image to 200px by 200px. For a complete list of actions and their usage, please see the Actions section of this document.
$imageLibObj -> resizeImage(200, 200);
A noteworthy feature of Image Tools with BMP Support is that you can apply multiple actions to your image by simply listing each action one after the other. This is also referred to as "stacking."
You may have noticed the file we opened was of jpg file type, and we're saving the file as a png. This is absolutely fine. We can save the image to a number of different image types, should we wish.
The second parameter allows us to set the quality of the saved file from 0 - 100. 100 being the best. This only applies to image types that support the quality setting - that being jpg and png files. If you choose another type, such as gif or bmp, this parameter will simply be ignored.
$imageLibObj -> saveImage('path/to_image.png', 100);
Another noteworthy feature of Image Tools with BMP Support is the ability to convert images from one image type to another. Best of all, this is done by simply setting the extension to the desired file type. Be sure to check out our Supported Image Types section - we boast more supported image types than similar libraries on the CodeCanyon store!
And that's all there is to it! Below is an image to show you a little summary of what was just covered. Be sure to check out the Actions section below which is full of examples and other nice things!
Actions - top
Resize
The resize method allows you to resize your images in a variety of ways, depending on your needs. Firstly, you can resize an image to an exact width and height. This is useful if you know the original image ratio, otherwise distortion will occur.
A solution to preventing distortion is to use one of the clever resizing options such as landscape or portrait. The landscape option will resize the image to the width you specify and the height will be calculated automatically to maintain the image proportions. The Portrait option is the same but it's the height you specify that is used while the width is calculated.
But what if the image is uploaded by a user and we don't know if it's landscape or portrait? We've thought of that, too! auto mode will determine the images orientation and resize the image appropriately using either landscape or portrait automatically.
The last option in our bag of tricks is the crop option. This will resize the image as close as it can to the size you specified, while still maintaining the aspect ratio, then crop the rest. This is extremely useful for creating images, such as thumbnails, that are all the same size and don't have distortion!
Parameters
- $width: The width to resize your image to
- $height: The height to resize your image to
- $option (default: 'exact'): The type of resize you wish to perform. You can either the numerical or textual value when defining the option:
| Option | Description |
|---|---|
| 0 or exact (default) | Defined size. Will use the exact height and width dimensions you set |
| 1 or portrait | Keep aspect. The height you set will be used. The width will be calculated and set automatically to a value that retains the aspect ratio. |
| 2 or landscape | Keep aspect. The width you set will be used. The Height will be calculated and set automatically to a value that retains the aspect ratio. |
| 3 or auto | Determine best option. Depending whether the image is landscape or portrait, this will automatically determine whether to resize via 'exact', 'portrait', or 'landscape'. This is useful when you have no control over whether the image to be resized will be landscape or portrait. |
| 4 or crop | Resize and crop. Will resize the image and then crop the image for the best fit, making the image the exact size you specify. |
- $sharpen (default: false): Apply subtle sharpening to make your image standout.
$imageLibObj -> resizeImage($width, $height, $option = 0, $sharpen = false)
Examples
Exact resize
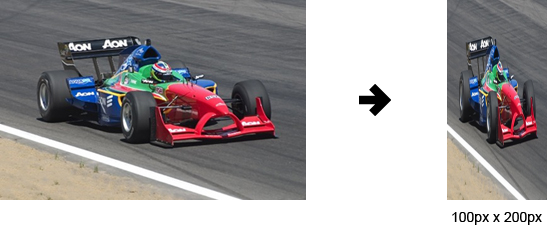
$imageLibObj -> resizeImage(100, 200, 'exact');
Crop option
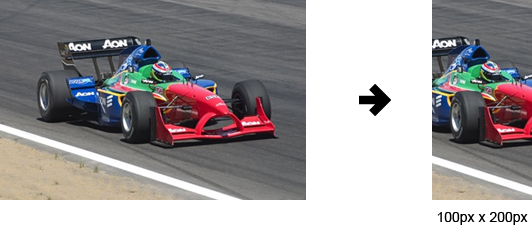
$imageLibObj -> resizeImage(100, 200, 'crop');
Landscape option
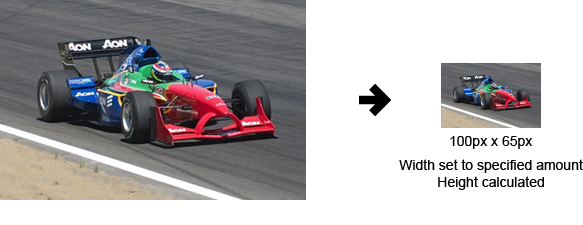
$imageLibObj -> resizeImage(100, 200, 'landscape');
Sharpening

$imageLibObj -> resizeImage(100, 200, 'true');
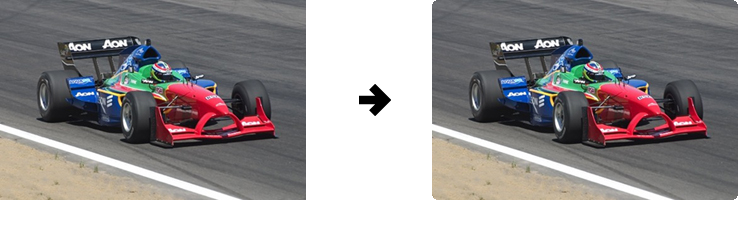
Resize With the Crop Option
A new feature as of version 1.4 is the ability to select the crop position. Previously, this defaulted to the center of the image.
To do this, you need to pass the crop resize option as an array. The first element being the crop option, the second being the crop position.
Here is an example:
$imageLibObj -> resizeImage(100, 200, array('crop', 'tl'));
tl stands for "top-left". After the image has been resized, the crop position will not be the top left corner. See the table below for other values.
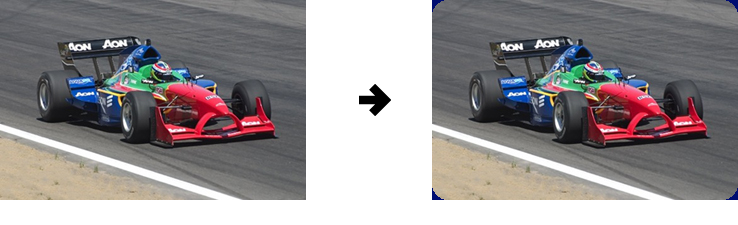
As of version 1.5 this became a bit simpler by, instead of passing an array with the option, you can pass a hyphenated string. The first part of the string is "crop" followed by the position which is separated by a hyphen.
Here is an example:
$imageLibObj -> resizeImage(100, 200, 'crop-tl');
The above two examples are both valid and will produce the same result.
| shortcode | Description |
|---|---|
| tl | top left |
| t | top (middle). |
| tr | top right. |
| l | left |
| m | middle (image center) |
| r | right |
| bl | bottom left |
| b | bottom (middle) |
| br | bottom right |
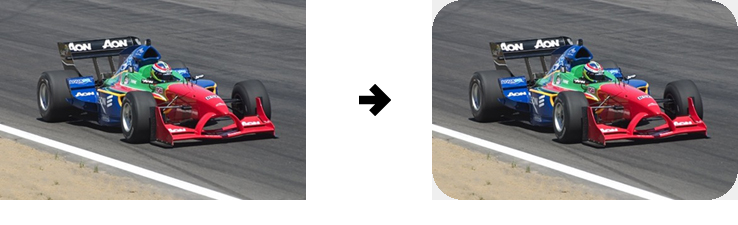
| auto (v1.5) | If the image is landscape, the image will be cropped in the center. If the image is portrait, the image will be cropped 10% (default) from the top
of the image. This is useful when the images are of people as their heads are usually in the top portion of the photo.
You can change the percentage from the top with the setCropFromTop() method. E.G., setCropFromTop(20); |
Crop (no resize) (v1.5)
As of v1.5 you can apply a crop to an image without having to resize it first.
Parameters
- $width The width to crop your image to
- $height The height to crop your image to
- $cropPos (default: 'm'): See the crop options table for more values.
$imageLibObj -> cropImage($width, $height, $cropPos = 'm');
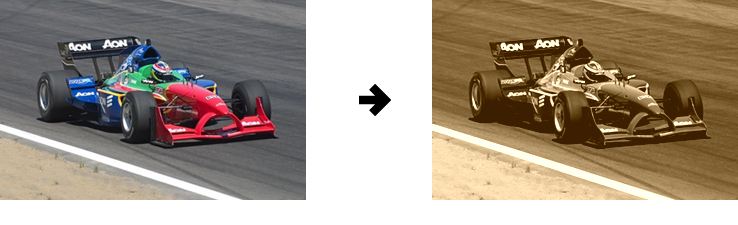
Vintage
To apply a vintage look:
$imageLibObj -> vintage();
Examples
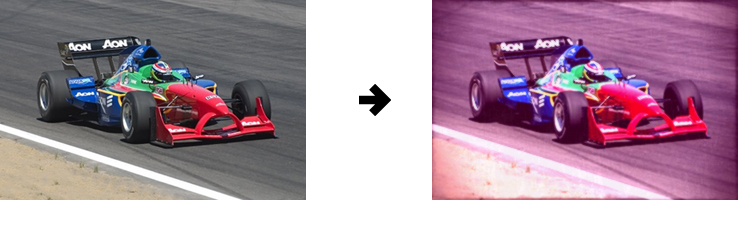
$imageLibObj -> vintage();
Note: For best results use an image 950 x 650px or smaller.
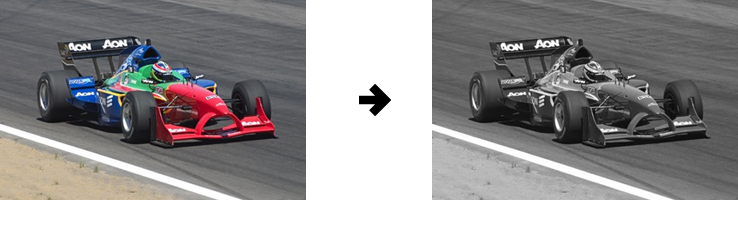
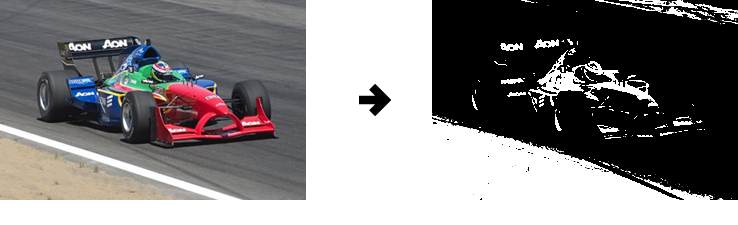
Greyscale
There are 3 greyscale effects that can be applied. The first is the basic stock standard GD greyscale, the second is an enhanced version adding in some contrast. And lastly there is the dramatic greyscale effect.
Greyscale basic$imageLibObj -> greyScale();Greyscale enhanced
$imageLibObj -> greyScaleEnhanced();Greyscale dramatic
$imageLibObj -> greyScaleDramatic();
Examples
Greyscale basic
$imageLibObj -> greyScale();
Greyscale enhanced

$imageLibObj -> greyScaleEnhanced();
Greyscale dramatic
$imageLibObj -> greyScaleDramatic();
Note: With Greyscale dramatic use an image 950 x 650px or smaller for best results.
Sepia
To apply a sepia look:
$imageLibObj -> sepia();
Examples
$imageLibObj -> sepia();
Black & White
To turn your image black & white:
$imageLibObj -> blackAndWhite();
Examples
$imageLibObj -> blackAndWhite();
Negative
To turn your image into a negative:
$imageLibObj -> negative();
Examples
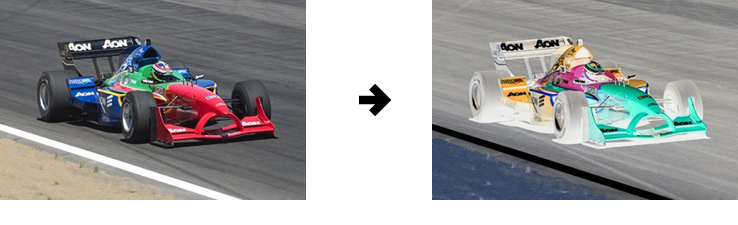
$imageLibObj -> negative();
Image Rotation
Parameters
- $direction (default: 90): The direction to rotate your image. The following values can be used:
| value | Description |
|---|---|
| left | Rotates image left, or 90 degrees, clockwise. |
| right | Rotates image right, or 270 degrees, clockwise. |
| upside | Rotates image upside down, or 180 degrees clockwise. |
| 0 - 360 | Specify an exact amount in degrees to rotate your image in a clockwise direction. |
- $color (default: transparent): Should you rotate your image to an angular position, the color parameter specifies the background filler color. See our Using Colors sections to see the possible ways to format your colors.
$imageLibObj -> rotate($direction = '90', $color = 'transparent');
Examples
Rotate 'left'
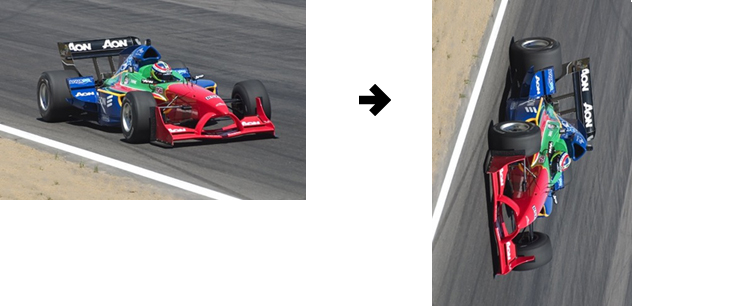
$imageLibObj -> rotate('left');
Rotate 200 degrees (transparent background)
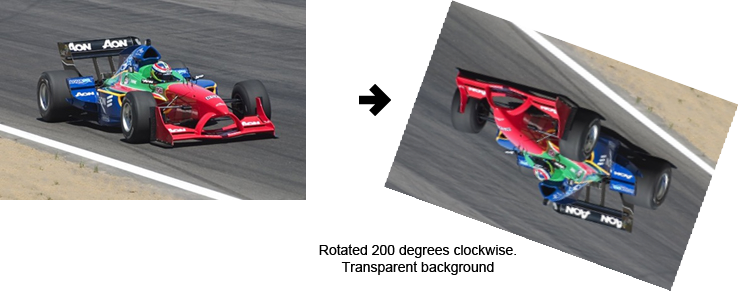
$imageLibObj -> rotate(200);
Rotate 75 degrees (colored background)
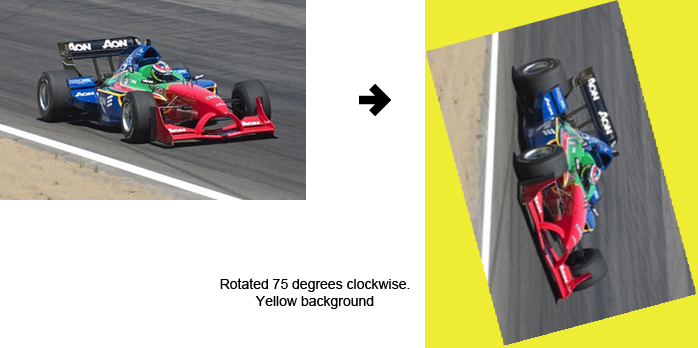
$imageLibObj -> rotate(75, '#EFEC34');
Watermarking
Image Tools with BMP Support provides you with some powerful techniques to watermark your digital images, without sacrificing ease of use.
For example, Image Tools with BMP Support can apply opacity to your image* on the fly!
Another great feature is the ability to use shortcodes to place the watermark image. E.G., "tr" will place your watermark image in the top right corner of the original image. This is very useful if your batch processing images of different sizes and you want your watermark image in the same position on every image. This in conjunction with the padding parameter, you can get your watermark to sit nicely where ever you please!
*This feature requires the watermark image to be a png file.
Parameters
- $watermarkImage: The image (and path) to your watermark image.
- $position: You can specify the exact pixel co-ordinates (taken from watermarks top-left corner) or use one of our shortcodes.
| shortcode | Description |
|---|---|
| tl | top left |
| t | top (middle). |
| tr | top right. |
| l | left |
| m | middle (image center) |
| r | right |
| bl | bottom left |
| b | bottom (middle) |
| br | bottom right |
| value | Description |
|---|---|
| [x] x [y] (eg "40 x 30") | Position the watermark (from the top left corder) x number of pixels in from the left, and y number of pixels from the top. In the example it would be 40 pixels in and 30 pixels down. |
- $padding: (default: 0): The amount of padding, in pixels, to apply from the edge of the screen. This is only used if your're using a shortcode otherwise this value is ignored.
- $opacity: (default: 0): Set the amount of transparency to apply to your watermark image. This is only available to png image types. 0 is no transparency.
$imageLibObj -> addWatermark($watermarkImage, $position, $padding = 0, $opacity = 100);
Examples
Watermark positioning with shortcode
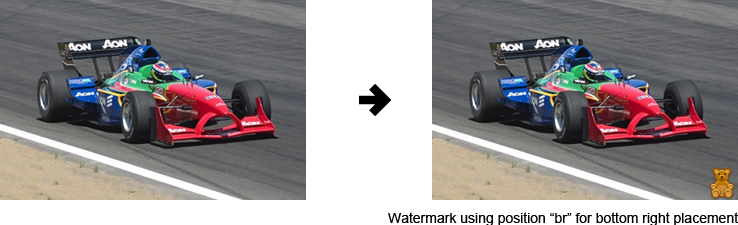
$imageLibObj -> addWatermark('sample_images/bear.png', 'br');
Watermark positioning with shortcode and padding
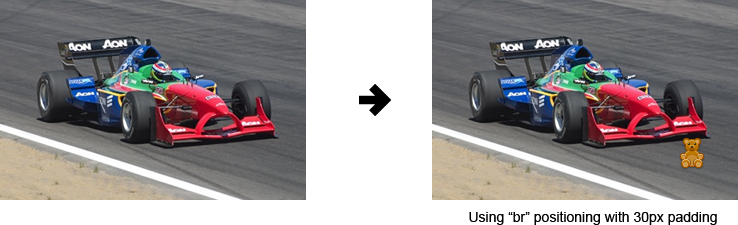
$imageLibObj -> addWatermark('sample_images/bear.png', 'br', 30);
Watermark exact position with applied transparency
$imageLibObj -> addWatermark('sample_images/bear.png', '20 x 30', 0, 30);
Text
Add text to your image, wheather it be your copyright or just your name. Select a custom font, size, color, and even the angle.
Parameters
- $text: The string of text to display on your image
- $position (default: '20x20'): You can specify the exact pixel co-ordinates (taken from text top-left corner) or use one of our shortcodes.
| shortcode | Description |
|---|---|
| tl | top left |
| t | top (middle). |
| tr | top right. |
| l | left |
| m | middle (image center) |
| r | right |
| bl | bottom left |
| b | bottom (middle) |
| br | bottom right |
| value | Description |
|---|---|
| [x] x [y] (eg "40 x 30") | Position the text (from the top left corder) x number of pixels in from the left, and y number of pixels from the top. In the example it would be 40 pixels in and 30 pixels down. |
- $padding (default: 0): The amount of padding, in pixels, to apply from the edge of the screen. This is only used if your're using a shortcode otherwise this value is ignored.
- $fontColor (default: '#fff'): The color of the font to use. See the Using Colors section for more information about specifying colors.
- $fontSize (default: 12): The size of the font you wish to use.
- $angle (default: 0): Angle of the text in degrees.
- $font (default: null): You can specify your own TTF font by simply passing the filename and path.
	$imageLibObj -> addText($text, $position = '20x20', $padding = 0, $fontColor='#fff',
				$fontSize = 12, $angle = 0, $font = null);
Examples
Basic text
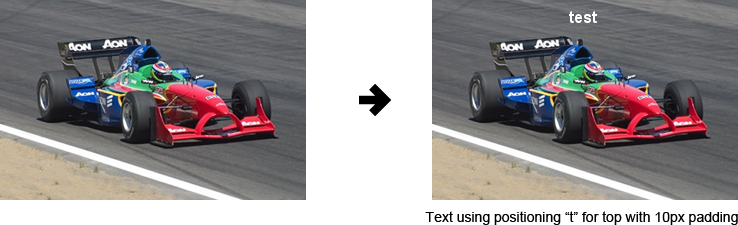
$imageLibObj -> addText('test', 't', 10);
Advanced text
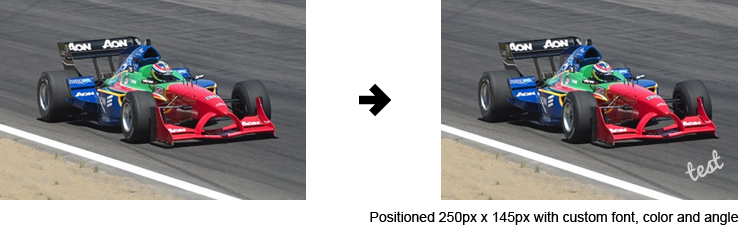
$imageLibObj -> addText('test', '250x145', 0, '#ccc', 18, 25, 'image_lib/fonts/Pacifico.ttf');
Border
Parameters
- $thickness (default: 1): The thickness of the border in pixels.
- $color (default: '#fff'): The color of the border. See the Using Colors section for more information about specifying colors.
$imageLibObj -> addBorder($thickness = 1, $color = array(255, 255, 255));
Examples
Border
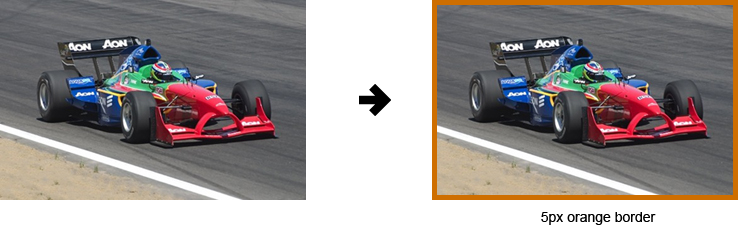
$imageLibObj -> addBorder(5, '#CE6E00');
Reflection
Parameters
- $reflectionHeight (default: 50): The height of the reflection.
- $startingTransparency (default: 30): The amount of transparency to start with. 100 = no transparency. A value between 0 and 15 produces good results.
- $inside (default: false): If set to 'true' then the reflection will be placed inside the image. I.E., the image will remain the same size. The top of the image will become cropped. 'false' will append the reflect to the bottom of the image meaning the image height will increase by the reflection height amount.
- $bgColor (default: '#fff'): The color the transparency will fade to. See the Using Colors section for more information about specifying colors.
- $stretch (default: false): If true, this will stretch the transparency mask to cover the whole of the reflection height specified. Set to False by default as it can cause banding.
$imageLibObj -> addReflection($reflectionHeight = 50, $startingTransparency = 30,
			      $inside = false, $bgColor = '#fff', $stretch=false);
Examples
Reflection "inside" (black background)

$imageLibObj -> addReflection(75, 30, true, '#000', true);
Reflection "outside" (white background)
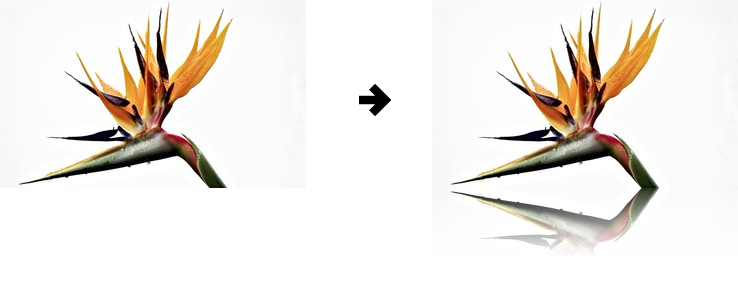
$imageLibObj -> addReflection(75, 10, false, '#fff', false);
Round Corners
Parameters
- $radius (default: 15): The amount of curvature to be applied to the corner.
- $bgColor (default: 'transparent'): The background color of the corners. See the Using Colors section for more information about specifying colors.
$imageLibObj -> roundCorners($radius = 15, $bgColor = 'transparent');
Examples
Rounded corners - 5 degree radius (transparent background)
$imageLibObj -> roundCorners(5, 'transparent');
Rounded corners - 15 degree radius (dark blue background)
$imageLibObj -> roundCorners(15, '#000D71');
Rounded corners - 30 degree radius (transparent background)
$imageLibObj -> roundCorners(30, 'transparent');
Shadow
Parameters
- shadowAngle (default: 45) The angle of the shadow to display. 0 will surround the image in a shadow.
- blur (default: 15): The amount of blur to apply. The higher the amount, the bigger the shadow.
- $bgColor (default: 'transparent'): The background color behind the shadow. See the Using Colors section for more information about specifying colors.
$imageLibObj -> addShadow($shadowAngle=45, $blur=15, $bgColor='transparent');
Examples
Shadow 45 degrees - 15 blur (spread)
$imageLibObj -> addShadow(45, 15)
Shadow 0 degrees - 30 blur (spread)
$imageLibObj -> addShadow(0, 30);
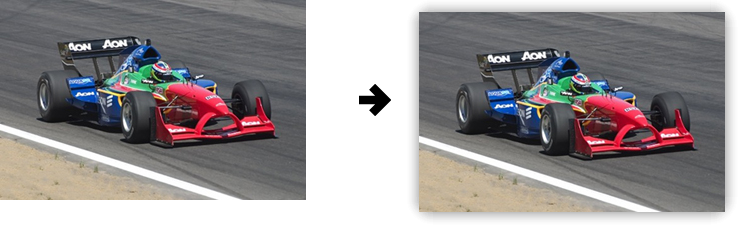
Caption Box
Parameters
- $side (default: 'b'): The side of the image to display the box. The options are:
| shortcode | Description |
|---|---|
| t | top |
| r | right side |
| b | bottom |
| l | left side |
- $thickness (default: 50): Specifies how wide the caption box is going to be, in pixel.
- $padding (default: 0) The distance from the caption box to the image edge.
- $bgColor (default: '#000'): The caption box color. See the Using Colors section for more information about specifying colors.
- $transaprencyAmount (default: 30): How transparent the caption box is. 0-100. 100 being fully transparent.
$imageLibObj -> addCaptionBox($side='b', $thickness=50, $padding=0, $bgColor='#000',
		$transaprencyAmount=30);
Examples
Caption on bottom box with text.
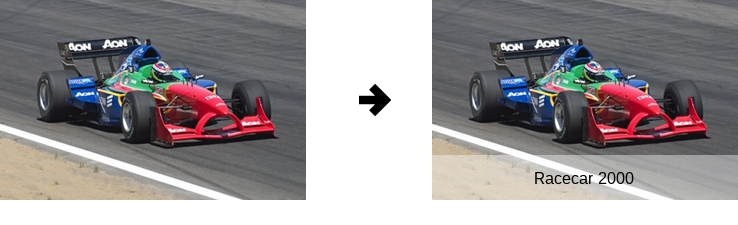
	$imageLibObj -> addCaptionBox('b', 45, 0, '#fff', 60);
	$imageLibObj -> addText('Racecar 2000', 'b', 16, '#000');
Caption box on left side with text. 20% transparency
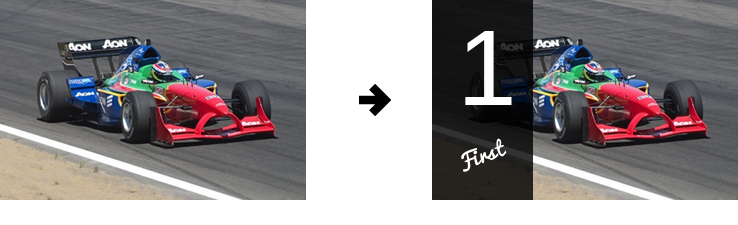
		$imageLibObj -> addCaptionBox('l', 100, 0, '#000', 20);
		$imageLibObj -> addText('First', '30x135', 0, '#fff', 16, 20, 'image_lib/fonts/Pacifico.ttf');
		$imageLibObj -> addText('1', '25x30', 0, '#fff', 80, 0);
Colored caption boxes. Right side box has padding of 20px.
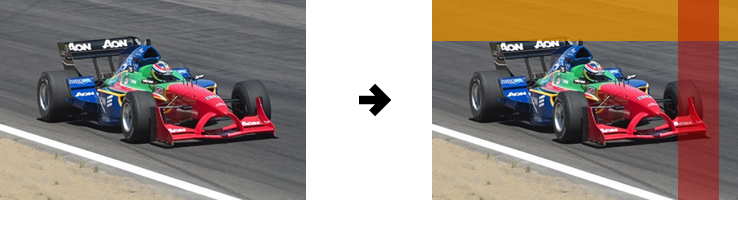
		$imageLibObj -> addCaptionBox('t', 40, 0, '#E18B00', 25);
		$imageLibObj -> addCaptionBox('r', 40, 20, '#B40000', 45);
Add Text to Caption Box (v1.5)
After adding a caption box, you're probably going to want to add the caption, right? This method is similar to addText() except it automatically centers the text within in the last caption box you added.
$imageLibObj -> addTextToCaptionBox($text, $fontColor='#fff', $fontSize=12, $angle=0, $font=null)
Examples
Here we add a caption box then add some text by calling addTextToCaptionBox. The text is automatically centered within the caption box.
	$imageLibObj -> addCaptionBox('t', 40, 0, '#E18B00', 25);
	$imageLibObj -> addTextToCaptionBox('this is my text');
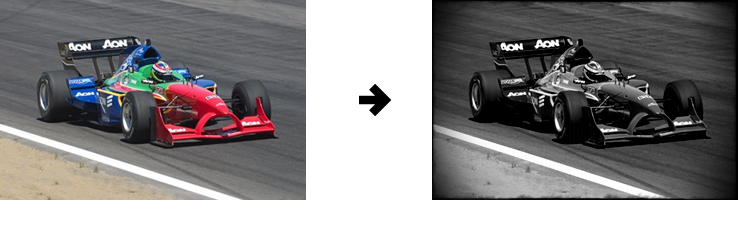
Stacking Example
A neat feature of Image Tools with BMP Support is the ability to "stack" multiple actions. That is, you can apply many transformations to the same image simply by calling the desired action one after the other.
The below image was created using the following actions.
<?php
include('image_lib/image_lib_class.php');
// *** Open image
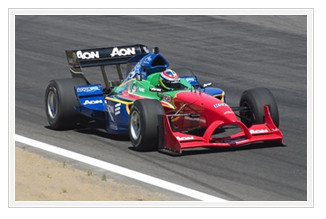
$imageLibObj = new imageLib('sample_images/racecar.jpg');
/*
* Stacked actions
*/
// *** Resize image
$imageLibObj -> resizeImage(200, 200, 'crop');
// *** Add greyscale
$imageLibObj -> greyScaleDramatic();
// *** Add white border
$imageLibObj -> addBorder(25, '#fff');
// *** Add black border
$imageLibObj -> addBorder(5, '#000');
// *** Add white border
$imageLibObj -> addBorder(1, '#fff');
// *** Add watermark (bottom, 40px from boarder, 50% opacity)
$imageLibObj -> addWatermark('sample_images/bear.png', 'tr', 30, 20);
// *** Add text
$imageLibObj -> addText('Racer', 'b', 10, '#000', 10);
// *** Save image
$imageLibObj -> saveImage('output.png', 100);
?>
Examples
Stacking

EXIF Information
We've also made it possible to extract the EXIF metadata from your digital photos. This works in a similar manner to applying actions; the big differences are that you do not need to call the save method; and your result is returned as an array. Don't worry, it's still very easy to use and the full code is included in the example below.
Returns
- Returns an associative array with EXIF information.
$exifArray = $imageLibObj -> getExif();
Examples
Image EXIF information
| Make | Canon |
| Model | Canon EOS 500D |
| Date | 2010:12:22 15:03:35 |
| Exposure | 1/400 sec. |
| Aperture | 3 EV |
| F-stop | f/2.8 |
| F-number | 28/10 |
| F-number value | 2.8 |
| ISO | 100 |
| Focal length | 50.0 mm |
| Exposure program | aperture priority |
| Metering mode | pattern |
| Flash status | flash did not fire, compulsory flash mode |
| Creator | |
| Copyright |
	include('image_lib/image_lib_class.php');

	$imageLibObj = new imageLib('sample_images/zoe.jpg');

	$exifArray = $imageLibObj -> getExif();

	// *** Array values assigned to variables
        $make = $exifArray['make'];
        $model = $exifArray['model'];
        $date = $exifArray['date'];
        $exposure_time = $exifArray['exposure time'];
        $aperture_value = $exifArray['aperture value'];
        $f_stop = $exifArray['f-stop'];
        $fnumber = $exifArray['fnumber'];
        $fnumber_value = $exifArray['fnumber value'];
        $iso = $exifArray['iso'];
        $focal_length = $exifArray['focal length'];
        $exposure_program = $exifArray['exposure program'];
        $metering_mode = $exifArray['metering mode'];
        $flash_status = $exifArray['flash status'];
        $creator = $exifArray['creator'];
        $copyright = $exifArray['copyright'];
Reset (v1.5)
Say you upload an image and you want to resize this image to 3 different sizes and save the results. Calling reset() after each resize/save will reset the image to it original form so you can resize it again, or apply an action.
	// *** Open image
	$imageLibObj = new imageLib('sample_images/racecar.jpg');

	// *** Resize and add a border to the first copy
	$imageLibObj -> resizeImage(300, 200, 'crop');
	$imageLibObj -> addBorder(5, '#f0f0f0');
	$imageLibObj -> saveImage('output_15.1_a.png', 100);

	$imageLibObj->reset(); # resets the image resource

	// *** Resize and add a border to the second copy
	$imageLibObj -> resizeImage(200, 100, 'crop');
	$imageLibObj -> addBorder(5, '#333');
	$imageLibObj -> saveImage('output_15.1_b.png', 100);

	$imageLibObj->reset(); # resets the image resource

	// *** Resize and add a border to the third copy
	$imageLibObj -> resizeImage(200, 200, 'crop');
	$imageLibObj -> addBorder(5, '#333');
	$imageLibObj -> saveImage('output_15.1_c.png', 100);
See demo: 15.1_chaining_(reset).php
Border Presets (v1.5)
By staking various actions, namely the border action, you can create some nice looking borders. Border presets are a way of storing those combinations of actions and using them over and over again, easily.
Parameters
- preset name The name of the preset to call.
$imageLibObj -> borderPreset('[preset name]');
Note: Border presets are intended for thumbnail sized images. (but that does not mean you couldn't use them for large images, either)
Examples
Currently there is only the one preset.
$imageLibObj -> borderPreset('simple');
C) Batch Resize - top
Batch Resize is our tool for when you need to resize a folder of images easily. The process is very similar to manipulating a single image so it's pretty easy stuff.
- The first thing to do is include the image batch class
- Next we select the folder with the images we wish to resize/apply actions to.
- Then we apply our actions just as you would normally. See Image Tools for more information.
- And finally we save our images by simply passing in the save folder name (make sure it has write permissions!).
include('image_lib/image_batch_class.php');
Note: If you put your image_lib folder in a different location than shown above, you will need to change the path accordingly.
$batchObj = new imageBatch('path/to_folder');
Note: You can supply a second parameter to filter particular file types. This parameter can be an array of image types or a comma separated string. Use whatever you're comfortable with. See the Filter image type example.
Below is a very basic example of an action used for demonstration. It resizes all your images in the specified folder to 200px by 200px (assuming no filter has been set). For a complete list of actions and their usage, please see the Actions section of this document.
$batchObj -> resizeImage(200, 200);
A noteworthy feature of Image Tools with BMP Support is that you can apply multiple actions to your image by simply listing each action one after the other. This is also referred to as "stacking."
The second parameter set the image quality (0-100, 100 being the best).
$batchObj -> save('path/to_folder', 100);
Note: You can also convert all the image to specific file type like jpg, regardless what the source file type is by passing in a third parameter of the desired type. E.G., 'jpg'. See the Convert image type example.
Examples
Filter image type
This example will only resize images that are png's or gif's
	require_once('image_lib/image_batch_class.php');

	$batchObj = new imageBatch('sample_images', 'png, gif');

	$batchObj -> resizeImage(150, 100, 'crop');

	$batchObj -> save('output_folder', 100);
Convert image type
This example will only resize images that are bmp's and save them as a jpg file type
	require_once('image_lib/image_batch_class.php');

	$batchObj = new imageBatch('sample_images', 'bmp');

	$batchObj -> resizeImage(150, 100, 'crop');

	$batchObj -> save('output_folder', 100, 'jpg');
D) Dynamic URI's - top
Usage
Dynamic URI's is a great way to automatically create thumbnails on the fly - no need to upload multiple sizes of your images anymore! Best of all, you can still apply your favorite actions to your thumbnails!
Basic Example
Below is an example showing you how to do a basic resize. We'll use this as our example to show you each component that makes up our dynamic URL.
<img src="image_lib/thumb.php?src=images/racecar.jpg&w=150&h=100" alt="" >
- image_lib/thumb.php?: This is the path to the thumb.php library. This is the library that will do the hard work. This example is using the default installation path.
- src=images/racecar.jpg: This is the image and path you wish to resize. This must be an absolute path. In this example the image we want to resize is racecar.jpg in the folder images.
- &w=150: This is the width of the image you wish to create. In this example our thumbnail will be 150px wide.
- &h=100: This is the height of the image you wish to create. In this example our thumbnail will be 100px high.
Resize Option
As mentioned, dynamic URI's can use the full power of our standard Image Tools. This includes all the resize options, filters, and transformations. The next example will show you how to include a resize option.
<img src="image_lib/thumb.php?src=images/racecar.jpg&w=150&h=100&type=crop" alt="" >
Notice the "&type=crop"? That's telling the script to use the resize crop option. All resize options are supported including "exact" (default), "portrait", "landscape", and "auto". See the resizing section for more information.
Action Example
The &actions tag is used to specify actions. You can call any of the available actions by simply calling the action name followed by parentheses. This example will add a border to your thumbnail image.
<img src="image_lib/thumb.php?src=images/racecar.jpg&w=150&h=100&type=crop&actions=addBorder(); >
To find out more about actions, see the Actions sections.
Multiple Actions Example
To include multiple action we simply chain them together with a semi-colon (;)
<.../thumb.php?src=images/racecar.jpg&w=150&h=100&type=crop&actions=addBorder();addShadow(); >
This example will add a border and then apply a shadow to our thumbnail image. Remember to check the Actions section to see what other effects can be applied!
Actions with Parameters Example
Some actions allow you to pass some settings such as a color to tailor an effect. No worries, we got you covered.
Using the previous example, lets add some settings.
<...?src=images/racecar.jpg&w=150&h=100&type=crop&actions=addBorder(3,FF0000);addShadow(45); >
Now our thumbnail will have a red (FF0000), 3px thick border with a 45 degree shadow.
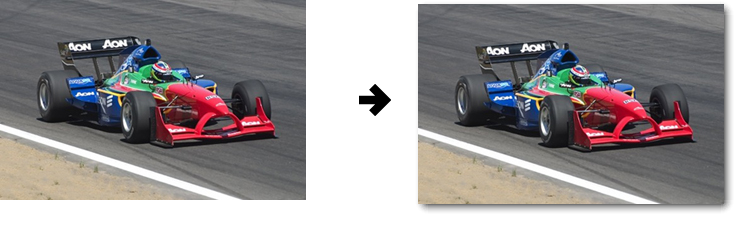
Using the Crop Option
New in v1.4 is the ability to select where to set the crop position. This is done with &pos followed by the position: r=right, l=left, t=top, etc. See Resize With the Crop Option for more information.
<img src="image_lib/thumb.php?src=images/racecar.jpg&w=150&h=100&type=crop&pos=r" alt="" >
Things to note:
There are a few thing to note in the above example. Because we're passing this information through the URI there are a couple syntax differences. These are listed below:
- Remove quotes.
- Remove '#'. Normally prefixing colors, they are not needed
E) Image Uploader - top
The upload class gives you the ability to effortlessly upload your images and then apply some processing.
The example I'm about to cover will just be on the code specifically to deal with the upload. For a real life example be sure to check out the demo file 14.1_upload.php . This covers form submission and any errors returned, etc.
Here, I'll begin by discussing each piece of code and then give you the complete code at the end. Also be sure to check out the demo!
Usage
- The first step is to include the upload class, enclosed within PHP tags. Note that we don't include image_lib_class.php as well. Our upload class extends image_lib_class.php meaning it still provides the same functionality.
- Next we set some settings.
- $formInputName: This is the name given to the forms file input
- $savePath: The folder and path of where to save the image
- $saveName: The name of the image to save as - without the extension
- $allowedExtArray: Set allowed file types. Only these file types will be allowed
- $imageQuality: The image quality to save the image as
- Now we create our upload object, passing in the setting we've just set.
- Here we perform our processing - just like we would normally do! I've added a couple of actions just as examples. See the Action section for more actions to apply.
- And we end by saving our image. Don't worry about setting these parameters. We've already set these in our settings!
- Of course we also need some HTML! here the a basic upload form. Note the name="img-upload" part. img-upload needs to have the same name as the $formInputName setting!
include('image_lib/upload_class.php');
Note: If you put your image_lib folder in a different location than shown above, you will need to change the path accordingly.
	$formInputName   = 'img-upload';
	$savePath        = 'output3';
	$saveName        = 'test';
	$allowedExtArray = array('.jpg', '.png', '.gif', '.bmp');
	$imageQuality    = 100;
$uploadObj = new imageUpload($formInputName, $savePath, $saveName, $allowedExtArray);
	$uploadObj -> resizeImage(100, 100, 'crop');
	$uploadObj -> greyScaleDramatic();
Note: These are just a couple of examples of actions you can apply! See the Action section for more!
$uploadObj -> saveImage($uploadObj->getTargetPath(), $imageQuality);
	<form action="14.1_upload.php" method="POST" enctype="multipart/form-data">
		<input type="file" name="img-upload" value="" />
		<input type="submit" value="upload" name="submit" />
	</form>
Well that's pretty much it. Easy huh? See below for the complete code listing.
Complete Code Example
PHP
include('image_lib/upload_class.php');

$formInputName   = 'img-upload';
$savePath        = 'output3';
$saveName        = 'test';
$allowedExtArray = array('.jpg', '.png', '.gif', '.bmp');
$imageQuality    = 100;

$uploadObj = new imageUpload($formInputName, $savePath, $saveName, $allowedExtArray);

$uploadObj -> resizeImage(100, 100, 'crop');
$uploadObj -> greyScaleDramatic();

$uploadObj -> saveImage($uploadObj->getTargetPath(), $imageQuality);
HTML
<form action="14.1_upload.php" method="POST" enctype="multipart/form-data">
	<input type="file" name="img-upload "value="" />
	<input type="submit" value="upload" name="submit" />
</form>
Make sure the form input name and $formInputName setting are the same!
Also change the forms action to the name and location of your file.
Note: One last reminder, make sure your upload directory is writable by the server.
F) Supported Image Types - top
The following image types are supported. Please note the following:
- Transparency support is determined by the file type not Image Tools with BMP Support
- gif is mostly supported by Image Tools with BMP Support but is not in a few cases
- The author of Image Tools with BMP Support does not develop/support/maintain the reading of psd files and therefor any bugs found will have to be fixed by the original author.
| Image type | Read support | Write support | Transparency support |
|---|---|---|---|
| jpg | |||
| png | |||
| gif | |||
| bmp | |||
| psd |
G) Using colors - top
As Image Tools with BMP Support strives for ease of use, we try to make every option and parameter as flexible as possible. Colors are no exception. All color parameters accept color supplied as hex or RGB. When using RGB, colors must be supplied in an array with the values in the order of RGB.
Where transparency is supported you can use the value 'transparent' to select transparency.
When supplying colors as a parameter the following formats can be used. The examples use the color white and is also case-insensitive.
- #ffffff
- #fff
- ffffff
- fff
- array(255, 255, 255)
- transparent
H) Advanced Settings - Core Library (image_lib_class.php) - top
Image Tools with BMP Support has a few configurable settings for the power users out there. These usually require opening up the PHP class files and making a change. But don't worry, this is not something that is required; just a way to make a few tweaks.
Enable PNG Interlacing
This will enable PNG interlacing. To do this, find the following code and set the value to true:
$this->pngInterlace = false;
Turn Off Debug Mode
This will prevent any custom messages from being displayed to the user. To do this, find the following code and set the value to false:
private $debug = true;
Saving Transparent Images to JPG (v1.5)
If you have a transparent png image and you wish to save it as a jpg, you need will need to turn transparency off with setTransparency(). You can also then set the background color of the image with setFillColor().
Example
	$imageLibObj -> setTransparency(false);
	$imageLibObj -> setFillColor('#cccccc');
	$imageLibObj -> resizeImage(64, 64);
I) Advanced Settings - Thumb Library (thumb.php) - top
Disable Cache
Set the USE_CACHE value to false like so:
define('USE_CACHE', false);
Disable Actions
Set the ALLOW_ACTIONS value to false like so:
define('ALLOW_ACTIONS', false);
Disable Auto Convert
If enabled, auto convert will automatically output images as png if you use an action such as shadows with transparency. To disable this, set the AUTO_CONVERT value to false like so:
define('AUTO_CONVERT', false);
J) Requirements - top
Image Tools with BMP Support requires the following.
- PHP 5.1.0, or greater, compiled with GD
Optional. Required for certain features
- PHP must be compiled with --enable-exif to use EXIF functionality.
K) Troubleshooting - top
If you have any issues, please try these first:
General- Ensure your save directory have write permissions. This should be set to 755.
- When using transparency, ensure you save the image as a png file. (or see here).
- Ensure the cache directory (image_lib/cache) is writable. This should be set to 755.
- If your images are not appearing or updating try:
- Clearing the cache. Simply delete the contents of the image_lib/cache folder
- In your browser, try force-refreshing the page. In most browsers this can be done by holding ctrl while pressing F5
- Ensure you're using an absolute path.
If you find a bug, please report it at bugs@oberto.co.nz
L) Sources and Credits - top
I've used the following methods or classes as listed.
- The following functions are taken from phpThumb() [available from http://phpthumb.sourceforge.net], and are used with written permission from James Heinrich.
- GD2BMPstring
- GetPixelColor
- LittleEndian2String
- The following functions are from Marc Hibbins and are used with written permission (are also under the Attribution-ShareAlike [http://creativecommons.org/licenses/by-sa/3.0/] license.
- PhpPsdReader is used with written permission from Tim de Koning. [http://www.kingsquare.nl/phppsdreader]
If you think this code is greater than the love child of a leprechaun and cherub, please consider giving it a 5 star rating. It gives me warm fuzzies. Honestly.
If you don't think it's worthy of 5 stars then please PLEASE send me an email (codecanyon@oberto.co.nz) and let me know why. I strive to make my code golden but can only do that with your feedback!
Thanks for purchasing Image Tools with BMP Support. As I said at the beginning, I'd be glad to help you if you have any questions relating to the code. No guarantees, but I'll do my best to assist!
Jarrod Oberto